1. Introduction
QubeGraphix is a desktop application for creating procedural 2D graphics with a visual node editor. You build designs by connecting nodes in a graph instead of drawing them. Every shape, every animation, every variation comes from the way the nodes are wired together.
The drawing is flat, but it can be placed in 3D space: a shape can be tilted (Rotation X) and lifted towards or away from you (Offset Z), a matrix can turn its whole layout in 3D (Rotation 3D) and draw it in parallel projection (Isometric) or in perspective (Focal Length), and the Depth modifier fades cells by their depth. There are no 3D solids or models.
It targets motion designers, generative artists, brand and pattern designers, and anyone who wants to explore procedural design without writing code. The output is exportable to PNG, SVG (static or animated) and MP4.
What you can build
- Generative patterns and motion graphics.
- Procedural illustrations, posters, brand pattern libraries.
- Animated SVG for the web, MP4 for social media.
- Interactive pieces driven by mouse input and time.
- Isometric or perspective compositions built from flat shapes.
The mental model
Every QubeGraphix project is a graph of nodes that ends at a QubeGraphix View node. Data flows left to right:
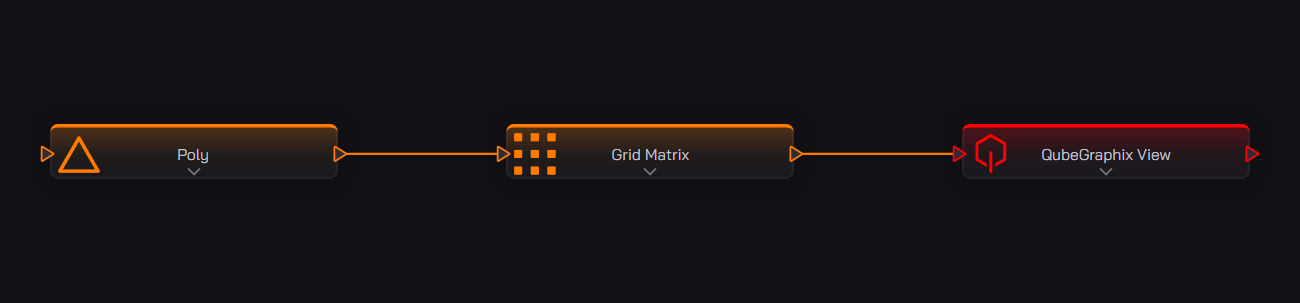
- Shapes define what to draw: lines, curves, arcs, meshes, polygons, text, rectangles (a rectangle can also carry an image).
- Matrices define where to repeat the shapes: on a grid, around a circle, or several matrices together in a Group.
- Modifiers alter the shapes per cell: by distance, noise, linear or radial ramps, image samples, 3D depth.
- Value nodes feed numbers, colours, and time into everything else.
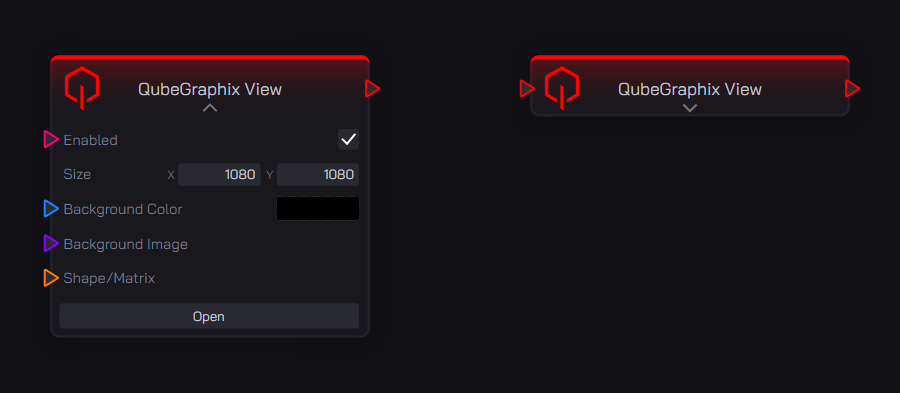
- QubeGraphix View is where the picture comes out: it has a size and a background, draws what is wired into it, opens its own window, and is what the Export node saves to a file.
2. Interface overview
QubeGraphix starts with a welcome screen. With a valid licence, click Enter; without one, the screen says what is wrong and offers Copy Hardware ID and Load License… (see chapter 22).
The editor then opens maximised: a thin top bar, and the node editor filling the rest of the window. The picture is not shown beside the node editor: each QubeGraphix View node opens it in a window of its own.
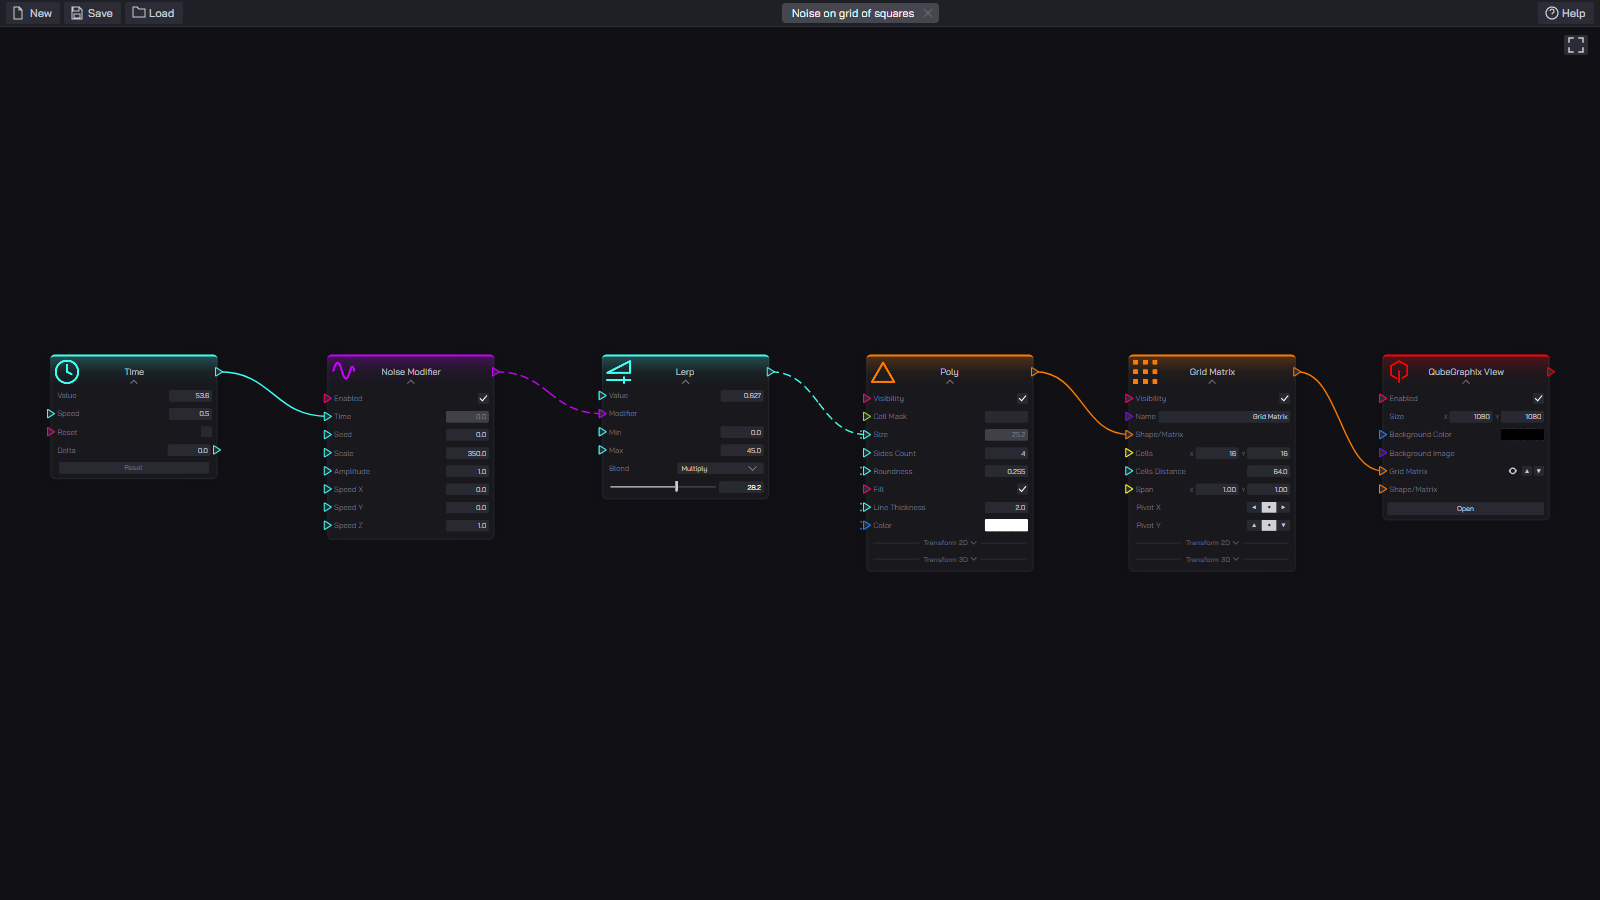
Top bar
- File actions (left):
New,Save,Load. New opens an empty project in a new tab. Save always asks where to save the.qxfile, starting from the file's current name and folder. Load opens a.qxfile in a new tab. - Tab strip (centre): one tab per open project. An asterisk before the name means unsaved changes; the × closes the tab and asks first if it has unsaved changes. Double-click a tab to rename it: a saved project's file is renamed on disk. Several projects can stay open in parallel: switch between them with a click.
- Help (right): Manual, Explain Graph (English or Italiano), Send Feedback…, Load License… (applied the next time you start QubeGraphix) and About QubeGraphix.
The node editor
- The area where you place nodes and draw connections. What you build there, nodes and wires together, is the graph.
- The button in its top-right corner toggles fullscreen: the editor window without its title bar, filling the screen.
- Switching tab frames all the nodes of that project.
The View window
- Click Open on a QubeGraphix View node to open its window. It shows that node's picture, redrawn every frame, and is titled after the node (see chapter 6).
- The window opens at the size of the canvas, so the picture is at 100% with no border around it. A canvas larger than the screen opens as large as the screen allows, with the same proportions.
- The top-right corner shows the current zoom and three buttons: Fit fits the whole canvas in the window, 100% shows it at its actual size, 200% at twice that. The shortcuts are Ctrl+0, Ctrl+1 and Ctrl+2.
- Middle-drag to pan the picture, mouse wheel to zoom. After Fit, resizing the window fits the picture again; a zoom you chose stays when you resize.
- The button in the top-right corner toggles fullscreen for that window; the bar-chart button in the top-left shows the performance read-out (milliseconds per frame, cell count, time per component).
- The Mouse node reads the pointer over this window.
- The window stays above the editor, never above other applications, and is minimised with it.
Panning, zooming, and selecting
- Pan: middle-click drag in the node editor, or Alt + left-drag.
- Zoom: mouse wheel, zooms toward the cursor.
- Frame: Shift+1 fits every node and comment frame on screen; Shift+2 zooms to the selected nodes or comment frame.
- Select single: left-click on a node.
- Rubber-band selection: left-click drag on the empty graph background.
- Add to or remove from the selection: Ctrl + click on a node; Ctrl + drag adds a rubber band to the current selection.
- Select a wire: click on it.
3. Start with the examples
The quickest way into QubeGraphix is a finished scene. The examples page collects scenes made for this, from a grid moved by noise to a clock that tells the time, each with a picture of what it builds:
In the beta, open one in the editor, change its values, unplug a wire and watch what happens. The chapters that follow describe the nodes you meet there.
4. Scenes written by Claude
Instead of starting from an example, you can describe the scene and let an AI build it.
create-qx is a skill for Claude, Anthropic's AI
assistant: once it is added to Claude, you ask for "a 6×6 grid of dots
that pulse" or "a speedometer reading 0 to 120" and Claude writes the
.qx file. Open it in QubeGraphix like any other scene: every
node can be edited, and the comment frames on the canvas explain how the
graph is built and what to change. Write in your own language; the notes
follow it.
The skill is the file create-qx.zip. In the beta it comes
with the beta kit, in the 5 AI skill folder. Each new kit can
carry a newer one: replace the old one the same way you added it.
In the Claude app or on claude.ai. The simplest way.
- In Settings, under Capabilities, turn on Code execution and file creation (in newer versions Create and edit files). The skill needs it.
- Open Customize → Skills, click +, then
Create skill → Upload a skill, and pick
create-qx.zipas it is, without unzipping it. - Check that create-qx is switched on in the list, then ask for a scene
in a new chat. Claude gives you the
.qxto download.
There Claude works in a space of its own and cannot see your QubeGraphix: open the file yourself and tell Claude what looks wrong. A screenshot helps. Menu names can differ slightly between versions of the Claude app.
In Claude Code. Claude Code runs on your computer, so Claude can open QubeGraphix without a window, render the scene to an image and look at it before handing it over.
- Unzip
create-qx.zip: you get a folder calledcreate-qx. - Put it in the skills folder of your user account, creating
skillsif it is not there:C:\Users\<you>\.claude\skills\create-qxon Windows,~/.claude/skills/create-qxon a Mac..claudeis a hidden folder. - In Claude Code, type
/create-qxfollowed by what you want, or simply ask for a QubeGraphix scene.
The skill checks every file it writes with a small Python script; if Claude Code says Python is missing, install Python 3. A skill added in the Claude app is not seen by Claude Code, and the other way round: they are two separate installs.
5. Node editor basics
Adding nodes
- Right-click on empty graph (on a Mac, Ctrl+click or a two-finger click): opens the menu with Copy, Paste, Create Component…, Add Comment Frame and Align, then the nodes: the QubeGraphix submenu (QubeGraphix View, Matrices, Shapes, Export) followed by the categories that are not tied to it (Values, Modifiers, Logic, Input, Output…). A row ending in (QG) is a QubeGraphix node filed under a generic category.
- Drag a wire from a connector and drop it on empty space: opens a menu of only the nodes that can take that wire; the node you pick is created there and connected.
- Paste (Ctrl+V): pastes the copied nodes at the pointer.
Connectors
Every node has inputs on the left side and outputs on the right side. Connectors are typed and colour-coded:
| Colour | Type | What it carries |
|---|---|---|
| Flow / Matrix (orange) | Shapes into matrices, matrices into Groups and QubeGraphix Views | |
| Float / Int (cyan) | Numeric values: size, rotation, distance, counts | |
| Vector2 (yellow) | XY pairs: positions, sizes, offsets | |
| Color (blue) | Colours and gradients | |
| Bool (pink) | True / false toggles | |
| Modifier (purple) | Spatial modulation sources (per-cell fields) | |
| String / Image (violet) | Text, paths, image references: share the same connector colour | |
| Font (soft pink) | Typography reference passed to Text shapes |
The outputs of a QubeGraphix View, and the wires leaving them, are red. A wire that carries a per-cell field is drawn dashed.
The editor refuses an incompatible connection: the wire does not connect when you drop it. A Modifier output connects only to a Modifier input (for example the Lerp's), and most inputs take a single wire.
Direct value editing
When an input has no incoming connection it shows an editable field. Type the number directly, or drag left or right on the row to scrub. Vector2 inputs show X and Y side by side.
Clicking a field, or reaching it with Tab, selects its whole value, so what you type replaces it; click again to place the cursor. Enter confirms the value and leaves the field selected, so Tab moves straight on to the next field: several values can be set from the keyboard alone. Tab stays inside the node, going through its value fields from top to bottom and back to the first; Shift+Tab goes the other way.
Moving, duplicating, deleting
- Drag a node's header to move it.
- Double-click a node's title to rename it.
- Ctrl+C copies the selection, Ctrl+V pastes it.
- Ctrl+D duplicates the selected node(s); the wires coming into them are connected to the copy as well.
- Delete or Backspace removes the selected nodes, wires and comment frames. Deleting a node removes its wires.
- To break a single connection, click the wire to select it and press Delete.
- Double-click a wire to add a reroute point on it.
- Ctrl+Z undoes, Ctrl+Y or Ctrl+Shift+Z redoes.
- Right-click a node for its own menu: Copy, Duplicate, Delete, Create Component…, Align and, when the manual is installed, Manual. F1 opens the manual at the selected node, or at the node under the pointer.
Collapsing nodes
Click the small chevron under a node's title to collapse it down to its header. Useful for keeping a large graph readable. Collapsed nodes still work; only their UI is hidden.
6. The QubeGraphix View node
Every scene ends in a QubeGraphix View: it is where the picture comes out.
7. Matrix nodes
Matrices repeat shapes across a 2D space, in rows and columns or around a centre, and nest inside each other to build compound shapes.
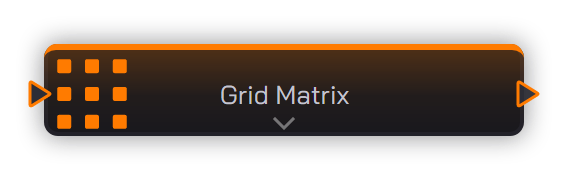
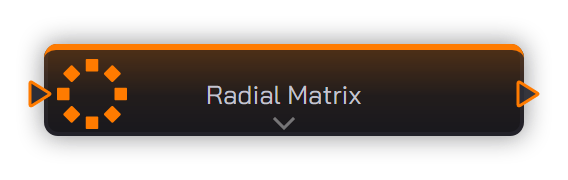
Every node above is documented in the full manual, with its inputs, outputs and defaults. It ships with the beta. Request access
8. Shape nodes
Shapes describe what to draw at each matrix cell, from a single stroke to a line of text.
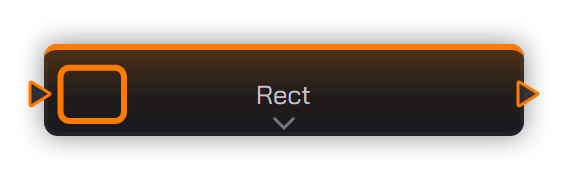
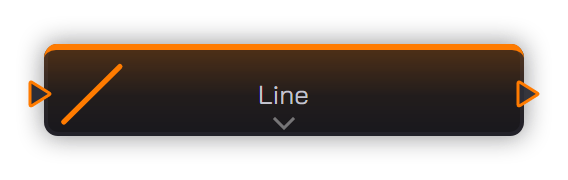
Every node above is documented in the full manual, with its inputs, outputs and defaults. It ships with the beta. Request access
9. Modifier nodes
Modifiers produce a value per cell instead of a single global value: a field that varies across the matrix.
Every node above is documented in the full manual, with its inputs, outputs and defaults. It ships with the beta. Request access
10. Value nodes
Value nodes produce what the rest of the graph reads: numbers, colours, ranges, curves, timing.
Every node above is documented in the full manual, with its inputs, outputs and defaults. It ships with the beta. Request access
11. Containers and groups
Containers wrap part of a graph, to move it as one piece or to package it as a Component you reuse anywhere. Cell Mask chooses which cells of a matrix draw.
Every node above is documented in the full manual, with its inputs, outputs and defaults. It ships with the beta. Request access
12. Input and output nodes
Input nodes bring data into the graph from outside. Output nodes send values out to other programs.
Output nodes
Every node above is documented in the full manual, with its inputs, outputs and defaults. It ships with the beta. Request access
13. Logic, debug & motion nodes
Nodes that hold state, make decisions and name things: what interactive scenes, data-driven layouts and small games are made of.
Logic helpers
Debug
Motion and collision
Every node above is documented in the full manual, with its inputs, outputs and defaults. It ships with the beta. Request access
14. Exporting
Add an Export node (QubeGraphix → Export) and wire
the Export output of a QubeGraphix View into its
QubeGraphix View input. Below the inputs is a row of format
tabs, PNG, SVG and MP4:
pick one, set its options, and click the button at the bottom
(Export PNG, Export SVG, Export MP4). A save
dialog asks where to write the file, suggesting the name of the scene.
The second input, Shape/Matrix, takes a shape, a matrix, a
Group or a Component's matrix output instead of a whole View. Each one is
exported on its own, cropped to what it draws plus a 10 px margin, on a
transparent background: useful for sprites and pattern tiles. PNG and SVG
use this input; MP4 exports only what is wired into
QubeGraphix View.
Both inputs take several wires. Every wire becomes its own file, named
after the one you chose with _0, _1… added.
With a single wire, the file keeps exactly the name you chose.
PNG
- Resolution: a multiplier from ×1 to ×4 (an 800×800 View at ×2 exports 1600×1600).
- Transparent Background: when on, the View's background colour is left out and the image keeps only what the shapes draw.
MP4
- Resolution: the same ×1 to ×4 multiplier as PNG.
- Duration: type the length in seconds, any positive number (a dot or a comma for decimals). 5 s is the default.
- Frame rate: type the frames per second, any whole number from 1 up. 30 fps is the default.
- Under the two fields, the number of frames the export will render. Both values are saved with the scene.
- PNG Sequence (folder): writes one PNG per frame
instead of a video. The name you choose in the save dialog becomes a
folder, and the frames inside it are numbered
Name_00000.png,Name_00001.png… so they sort in order in any editing program that imports an image sequence. With this on, Transparent Background appears, and works as for PNG.
There is no transparent background in the MP4 file itself: the video is encoded as H.264, the codec web browsers play, which has no alpha channel, so the View's background is always in the picture. A frame larger than 4096 × 2304 pixels is beyond the H.264 encoder: the file is then written as MPEG-4 Part 2, which desktop players open but browsers do not, and the editor says so. For an animation over a transparent background, use PNG Sequence. A progress window shows the frame being rendered; Cancel stops the export and removes the unfinished file or frames.
SVG
- Static (the default): a vector file of the scene as it is when you click Export, for print, archive or further editing in a vector tool.
- Animated (SMIL): the toggle labelled
Animated (SMIL) - Experimental !. From a QubeGraphix View it
records the scene for the Duration and at the
Frame rate set on the MP4 tab, and writes the motion
as SVG animation that loops, with no script: it plays in a browser
and inside an
<img>. From theShape/Matrixinput the animation is driven by a script inside the file instead, so it plays when the SVG is opened on its own but not inside an<img>. - Transparent Background: when off, the View's background colour is filled in; when on, the SVG has no background.
SVG has no Resolution setting: it is vector, and scales without loss.
15. Keyboard and mouse reference
Keyboard
| Shortcut | Action |
|---|---|
| Ctrl+Z | Undo |
| Ctrl+Y / Ctrl+Shift+Z | Redo |
| Ctrl+C | Copy the selection |
| Ctrl+V | Paste at the mouse pointer |
| Ctrl+D | Duplicate the selected nodes |
| Delete / Backspace | Delete the selected nodes, wires and comment frames |
| F1 | Open this manual at the selected node, or at the node under the mouse pointer |
New, Save and Load are buttons at the left of the top bar; they have no keyboard shortcut.
View
| Action | Result |
|---|---|
| Mouse wheel | Zoom toward the pointer |
| Middle-button drag | Pan the node editor |
| Alt + left-drag | Pan the node editor (for laptops) |
| Shift+1 | Fit every node and comment frame on screen |
| Shift+2 | Zoom to the selected nodes or comment frame |
| Ctrl+0 / Ctrl+1 / Ctrl+2 | In the View window: fit the canvas, 100%, 200% |
On a Mac
| Where this manual says | On a Mac |
|---|---|
| Ctrl (shortcuts, adding to a selection) | Cmd (⌘) |
| Right-click | Ctrl+click, or a two-finger click on the trackpad |
| Alt + left-drag, middle-button drag | Two fingers on the trackpad, or Option (⌥) + drag |
| Mouse wheel (zoom) | Pinch on the trackpad, or Cmd + two fingers; a mouse wheel zooms as on Windows |
Nodes and wires
| Action | Result |
|---|---|
| Click a node | Select it |
| Ctrl+click a node or a wire | Add it to the selection, or take it out |
| Drag a node's header | Move the node (and the rest of the selection) |
| Left-drag on empty graph | Rubber-band selection (Ctrl keeps the current selection) |
| Drag from a connector dot to another | Create a connection, from either end |
| Drop a wire on empty graph | Menu of the nodes that fit; the one you pick arrives connected |
| Drop an unconnected node next to a connector | The node is inserted between that connector and its wires |
| Click a wire, then Delete | Disconnect |
| Double-click a wire | Insert a Reroute point |
| Double-click a Reroute | Switch its wire between curved and straight |
| Left-drag on a number | Scrub the value |
| Click a value field, or Tab into it | Select the whole value; typing replaces it |
| Enter in a value field | Confirm the value; the field stays selected |
| Tab / Shift+Tab in a value field | Next / previous value field of the same node, wrapping round |
| Double-click a node's title | Rename the node (Enter confirms) |
| Double-click a tab | Rename the tab (and its file, once saved) |
| Right-click a node | The node's menu: Copy, Duplicate, Delete, Create Component…, Align, and Manual |
| Right-click empty graph | Add Node menu, with Copy, Paste, Create Component…, Add Comment Frame and Align |
16. Files, projects and saves
The .qx format
QubeGraphix saves every project as a single .qx file.
It contains:
- Every node, its settings, and its position in the node editor.
- All connections between nodes, and the comment frames.
- Embedded resources: the images of Image nodes, the font file of a Font node, and the sub-graphs of embedded Components.
- A format number and the version of QubeGraphix that saved it.
A file saved by a newer version of QubeGraphix than yours is refused, with a message saying so. A file that uses nodes your version does not have opens without them, and a message lists what was left out: saving that file removes those nodes for good.
The installer associates .qx files with QubeGraphix Beta
when no other program owns them, so a double-click opens the project.
.qx files work well under version control: keep your
projects in git, or any versioning system, to track and compare changes.
Saving
Each project opens in its own tab; New opens an empty one. Save always shows the save dialog, already on the project's name and folder, so the same button saves and saves under a new name. There is no auto-save: closing a tab or the window with unsaved changes asks before discarding them.
Preview thumbnails
Every save also writes a small preview PNG next to the project
(myproject.qx.preview.png). A Component linked to that
file shows it as its preview.
Linked and embedded Components
A linked Component points at another .qx
on disk, stored relative to the project when possible. When that file
is saved, every Component linked to it reloads by itself. Moving or
renaming the file breaks the link: repoint it with the Component's
Pick file... button. Embed copies the sub-graph into
the project, which then no longer depends on the file;
Extract to file… does the opposite.
Backup and version control
.qx files are safe to commit to git. The preview PNGs can
be regenerated by saving again; to leave them out, add
*.qx.preview.png to your .gitignore.
17. Troubleshooting
The welcome screen asks for a license
There is no valid QubeGraphix.license for this computer. The
centre of the welcome screen says which problem it is and what to do; chapter
21 walks through each case.
The QubeGraphix View shows nothing
- Make sure the View's
Enabledinput is on. - Make sure a shape, a matrix or a Group is wired into one of the
View's
Shape/Matrixslots, and that the slot's eye is open. - A matrix with nothing wired into its
Shape/Matrixinput draws only small red crosshairs, one per cell. - Check the
Visibilityinput of the matrix and of the shape: both must be on. - Check the shape's colours: a colour with alpha at 0 draws nothing.
A connection refuses to snap
QubeGraphix refuses a connection that cannot work. The usual reasons:
- The types do not match. An Int output goes into a Float input, a
shape or matrix goes into a
Shape/Matrixinput, but a Modifier output only goes into a Modifier input. - The input already has a wire. Most inputs take one; disconnect the old wire first.
- The wire would close a loop, such as a Group fed into a matrix it contains.
- The Export node's
QubeGraphix Viewinput takes only a QubeGraphix View.
MP4 export produces a frozen image
The export moves only what follows its own clock: Time nodes
and what they drive, and Date/Time. Live inputs such as Mouse,
OSC Receiver or MIDI In are not replayed. To put a performance in a
video, record it with a CSV Recorder, then play it back with a
CSV Player whose Position is driven by a Time
node: the export then renders the take frame by frame.
Export creates multiple files
Every wire into the Export node is exported to its own file, with
_0, _1… added to the name. Disconnect what you
don't want to export, or use the suffix as part of your naming scheme.
Slow rendering
Patches with hundreds of cells and several modifiers can become expensive. Tips:
- Remove a modifier's connection while you work on something else.
- Use fewer cells while designing, then raise them before exporting.
18. Useful information
Important paths
| File / folder | Windows | macOS |
|---|---|---|
| Program | C:\Program Files\QubeGraphix Beta\QubeGraphix.exe | /Applications/QubeGraphix Beta.app |
| EULA | C:\Program Files\QubeGraphix Beta\EULA.rtf | Shown at the first start |
| This manual | C:\Program Files\QubeGraphix Beta\Manual\ | Inside the app: Help → Manual |
| License (installed by Load License) | %LOCALAPPDATA%\QubeGraphix\QubeGraphix.license | ~/Library/Application Support/QubeGraphix/QubeGraphix.license |
| User settings | %LOCALAPPDATA%\QubeGraphix\settings.json | ~/Library/Application Support/QubeGraphix/settings.json |
| Crash log (only after a crash) | %LOCALAPPDATA%\QubeGraphix\crash.log | ~/Library/Application Support/QubeGraphix/crash.log |
On a Mac, press Cmd where this manual says Ctrl, and Ctrl+click works as a right click.
Project files
| Extension | Contents |
|---|---|
.qx | QubeGraphix project |
.qx.preview.png | Thumbnail written next to the project at every save |
Uninstall
Windows.
Use Uninstall QubeGraphix Beta in the Start menu, or find
QubeGraphix Beta in Windows' installed apps and choose
Uninstall. This removes the program, the manual, the
EULA copy, the two firewall rules and the .qx association.
The folder %LOCALAPPDATA%\QubeGraphix\
(license, settings, crash log) is not removed, so a
reinstall finds your license and preferences where they were.
macOS. Drag QubeGraphix Beta from Applications to the Trash. The folder ~/Library/Application Support/QubeGraphix/ stays, for the same reason.
Support
For issues not covered by chapter 17, contact
info@qubegraphix.com.
Attach the crash log, if there is one (the paths are in the table
above; on a Mac, Console.app also keeps a report under
Crash Reports) and, when possible, the offending .qx file.
Everything above is the product. What follows is the practical part: how the closed beta works, what your machine needs, how to install it, and how to activate your licence. If you are not in the beta yet, the end of this page tells you how to ask.
19. The closed beta
You are reading the beta edition of the QubeGraphix manual. It documents this build and nothing else: every node described here is a node you have, and every node you have is described here. Read it as the complete picture of the application in front of you.
This chapter is the short version: what the beta is for, what I already know is rough, and how to tell me what you find. Everything before it is the product.
19.1 What the beta is for
The beta is for trying QubeGraphix and telling me what works, what does not, and what is missing. Use it on real work: that is where the most useful feedback comes from. What you make with it is yours.
The terms are those of the licence agreement you accepted when you
installed it; on Windows a copy is in the install folder as EULA.rtf.
19.2 Known gaps in this build
Rough edges I already know about, so you do not spend time reporting them:
- Gradients in SVG. The gradient mode of the Color node (chapter 10) renders the same in the editor, PNG, MP4 and SVG, with two exceptions in SVG: a Sweep ramp exports as one flat colour, because SVG has no conic paint, and so does a ramp used as the QubeGraphix View's background.
- Gradients on Mesh. Line, Arc, Rect, Poly, Curve and Text carry a full ramp. Mesh draws flat.
- Animated SVG is experimental, as its toggle says.
- On a Mac, System audio needs macOS 14.2 or later. Everything else, exports included, works as on Windows.
- No Linux build yet.
19.3 Reporting a bug
Use Help → Send Feedback… in the editor, or write to info@qubegraphix.com. If Send Feedback cannot send, click Copy text and paste it into an email.
The beta sends nothing on its own: no statistics, no checks for news. Send Feedback has a box, Attach a usage summary, off unless you tick it. Ticked, it shows below exactly what goes with your message: how long this session has lasted, which nodes you created or loaded, which formats you exported, and the first line of the last crash, if there was one (with your user folder hidden). No file or scene names, no hardware ID.
What makes a report immediately actionable:
.qx file that reproduces it. A scene cut down to the
three nodes that still show the problem is worth ten full projects.
QubeGraphix-Beta-Setup-1.x.y.exe on
Windows, QubeGraphix-Beta-1.x.y-mac.dmg on a Mac).
20. System requirements
| Component | Requirement |
|---|---|
| Operating system | Windows 10 or Windows 11, 64-bit; or macOS 12 or later. |
| Architecture | Windows: x64 compatible. Mac: Apple Silicon or Intel, the same app for both. |
| Privileges | Windows: administrator rights to install (the installer adds firewall rules). Mac: none beyond your own password the first time the app opens. Loading a license needs no special rights on either. |
| Disk space | About 200 MB |
| License | A QubeGraphix.license file issued for the Hardware
ID of this machine. |
21. Installation
21.1 Windows
The installer is called QubeGraphix-Beta-Setup-1.x.y.exe, where
1.x.y is the version of the build you received.
What the installer does
- Copies
QubeGraphix.exeand its libraries to the install folder, with a copy of the EULA and this manual. - Adds two Windows firewall rules: incoming UDP on port 9000 (the OSC Receiver's default port) and incoming traffic for the QubeGraphix Beta program. Uninstalling removes them.
- Associates
.qxfiles with QubeGraphix Beta, unless another program already opens them. - Adds Start menu entries: QubeGraphix Beta and Uninstall QubeGraphix Beta.
21.2 macOS
The disk image is called QubeGraphix-Beta-1.x.y-mac.dmg. One
app runs on Apple Silicon and Intel Macs, macOS 12 or later.
.qx files take the QubeGraphix icon, and a double-click opens
them. When a scene first listens to the network (QxRemote on a phone, the OSC
Receiver), macOS may ask to allow incoming connections or access to the
local network: allow it.
22. License activation
QubeGraphix needs a license file, QubeGraphix.license, made for
your computer. Everything happens on the welcome screen that opens when
QubeGraphix starts.
22.1 The first start
Without a license, the centre of the welcome screen says what is missing and what to do, and the main button reads Load License… instead of Enter.
QubeGraphix.license. Save it
anywhere, for example in Downloads.
22.2 Renewing or replacing a license
When a license expires, or you receive a new one, load it from the editor with Help → Load License…. The new license applies the next time QubeGraphix starts; a file that is refused leaves your current license as it was.
22.3 When the welcome screen reports a problem
It names the problem and the way out. The cases you may meet:
- This license is for a different computer. A license works on one computer only. Send the hardware ID of this one (22.1, steps 1 and 2).
- Your license has expired. Send the hardware ID to have it renewed, then load the new file.
- This license file can't be used. Load the file exactly as it arrived, without opening or editing it.
- Could not read this computer's hardware ID. On Windows: Windows did not let QubeGraphix read the computer's identifiers, usually because a company policy restricts PowerShell. The license itself is fine: send the message to info@qubegraphix.com.
- The date on this computer looks wrong. Set the correct date and time in your system settings and start QubeGraphix again.
Not in the beta yet?
You have just read the whole manual, so you already know what the tool does and where it is rough. That is the honest version, and it is the version I would want before asking anyone for anything.
The beta is closed and I read every application myself. Tell me what you would build rather than what you do.